fabric recommends that you complete your brand’s master taxonomy mapping in Product Agent > Settings > Taxonomy prior to uploading products to Activate. Completing this process helps Product Agent create a structured catalog that supports consistent, high-quality product enrichment. For more information, see Taxonomy Overview.
Prerequisites
Ensure you have completed the previous step in the Activate process, Importing Products.Primary Procedure
- Review the Categories and Attributes that Product Agent identified to ensure they are correct. If you need to make changes to how Product Agent identified your Categories or **Attributes, see the Secondary Procedures section below.
- Click Import and Enrich. The Optimizing a Sample of Your Products window is displayed.
- Click See Enrichment Sample.
Secondary Procedures
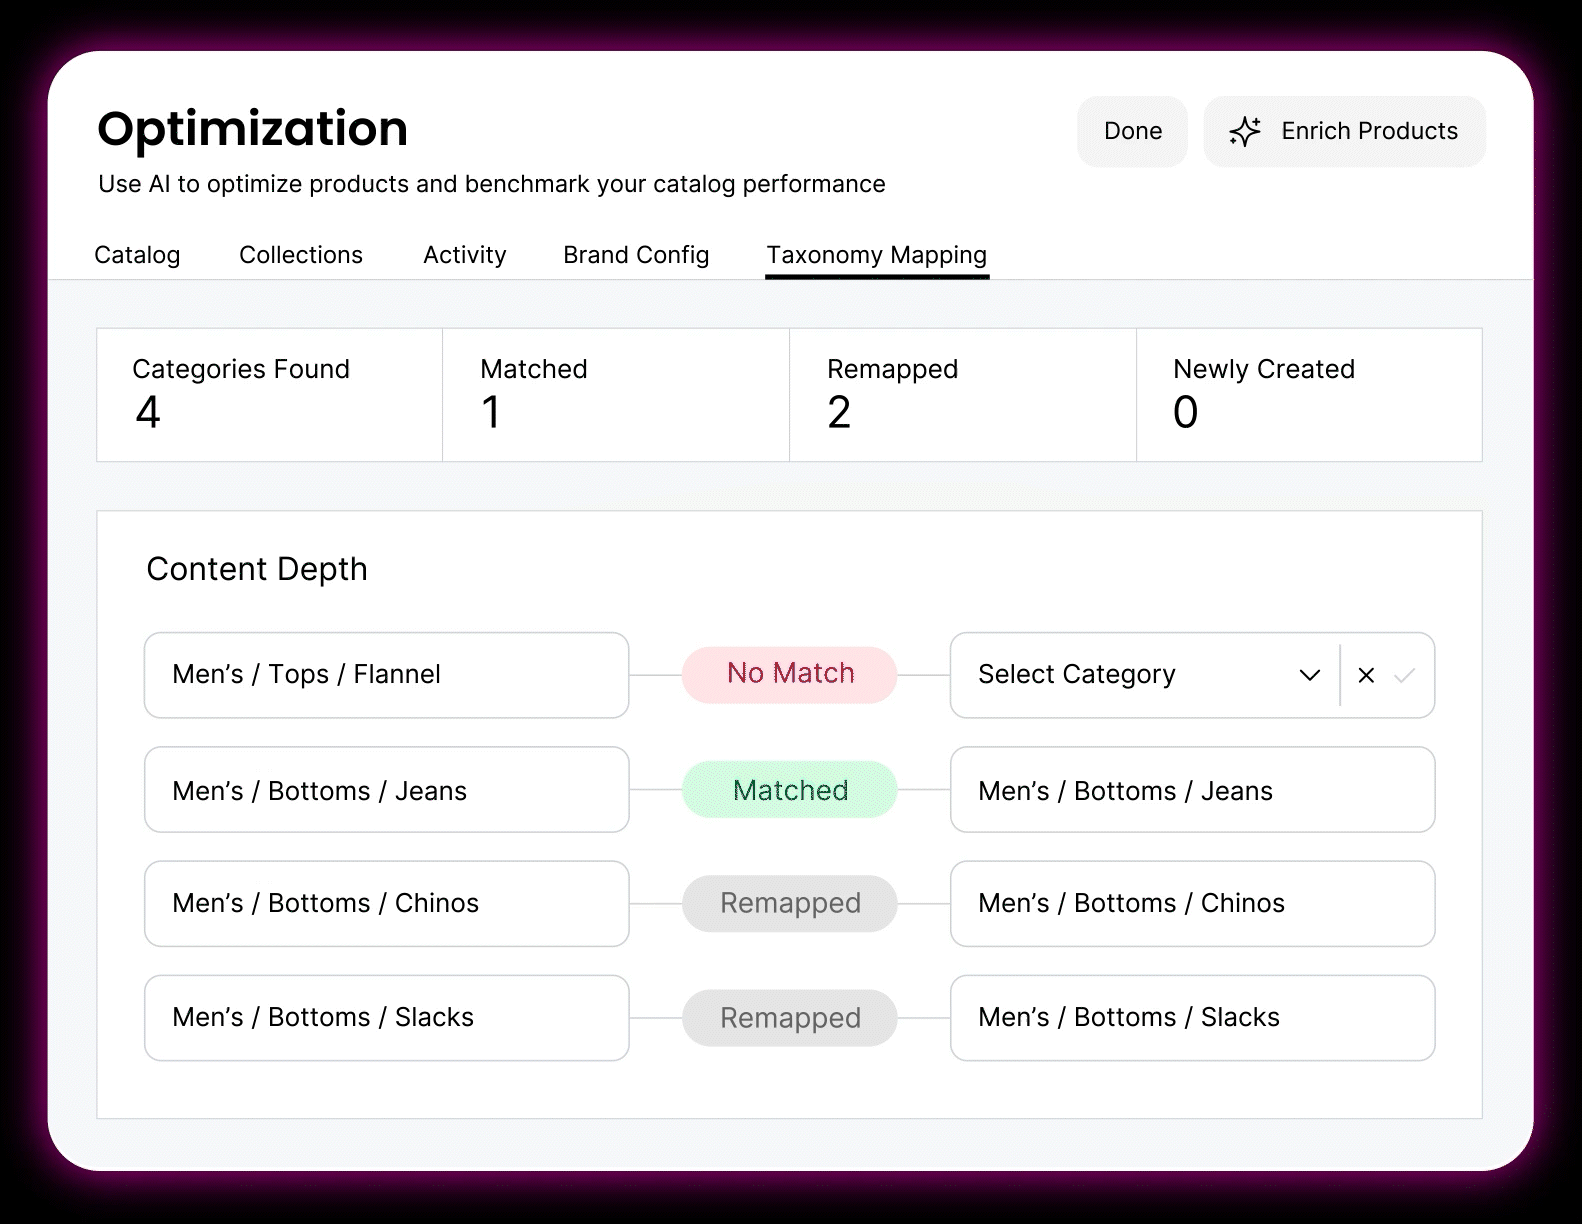
Changing a product’s category
- From the Categories tab, browse your products.
- For any mis-categorized product, click on its Category. The category selector menu is displayed.
- Select the matching category.
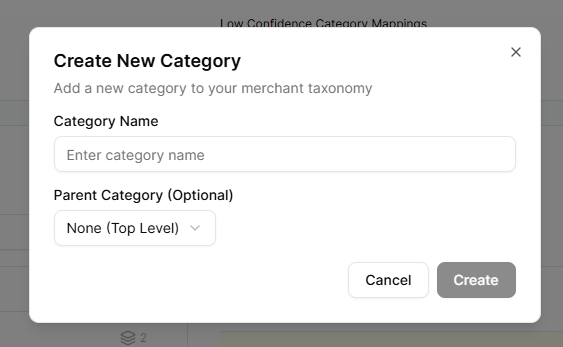
Adding a new category
- From the Categories tab, browse your products.
- For any mis-categorized product, click on its Category. The category selector menu is displayed.
- Click Create new category. The Create New Category* window is displayed.
- In the Category Name field, enter a name.
- (Optional) In the Parent Category field, select this new category’s parent category.
- Click Create.
Changing an attribute’s mapping
- From the Categories tab, click the Attributes tab and browse the attributes.
- For any mis-mapped attribute, click on its mapping. The attribute selector menu is displayed.
- Select the matching mapping.
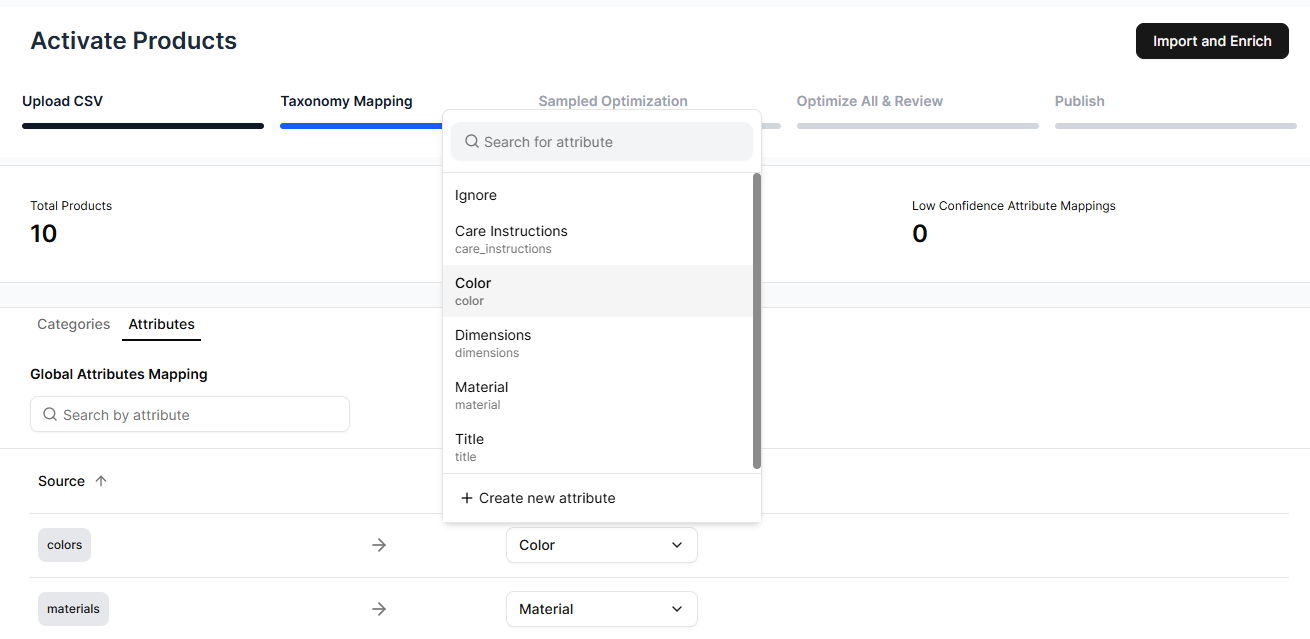
Adding a new attribute type
- From the Categories tab, click the Attributes tab and browse the attributes.
- For any mis-mapped attribute, click on its mapping. The attribute selector menu is displayed.
- Click Create new attribute. The Create New Attribute* window is displayed.
- In the Attribute Name field, enter a name.
- In the Attribute Key field, enter an identifier for use in your system, such as “color” or “size.”
- (Optional) In the Description field, enter a description.
- Click Create.